Stewards make projects
Stewards create the initial project record, fill out the core details, and assign the relevant users and companies. After the project is created, owner users or stewards can edit it, but a steward must create it first.
Step 0: Navigate to the Projects Tab
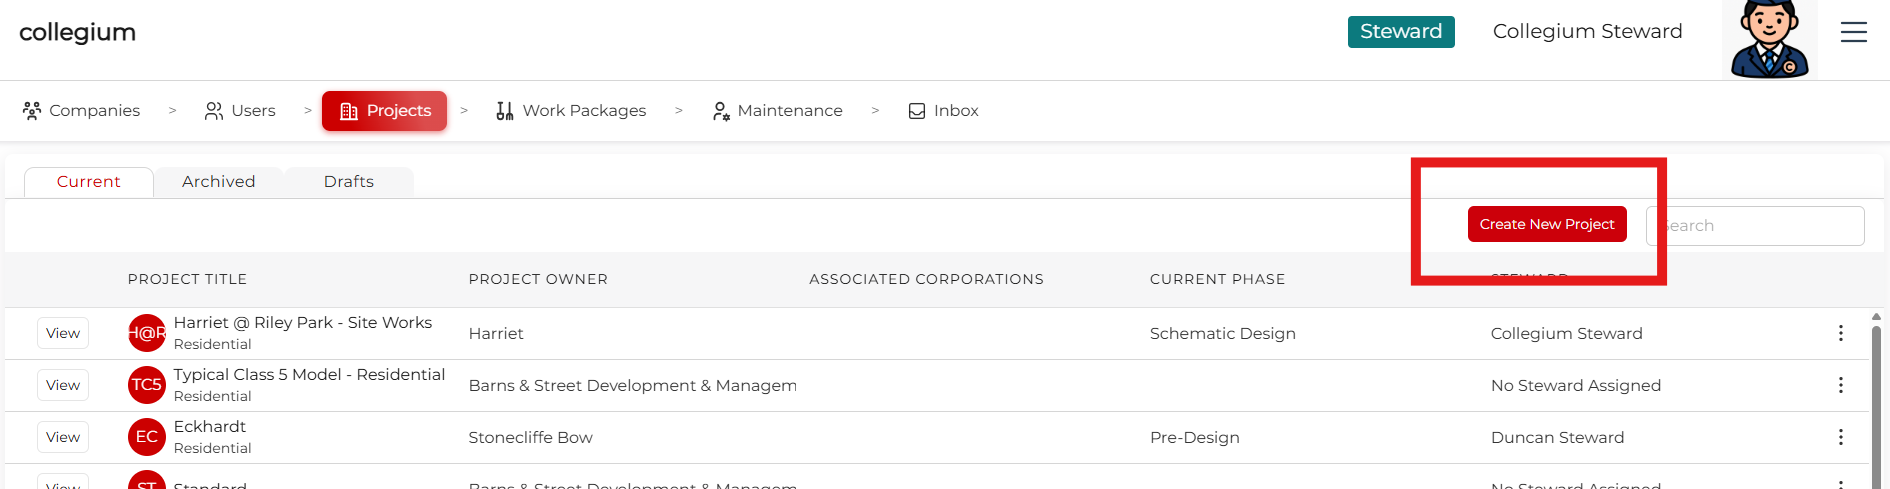
When logged in as Steward, click on Projects and observe all the projects on the platform. Click on the Create New Project button to open the Project Wizzard.
Step 1: Fill out the basic information
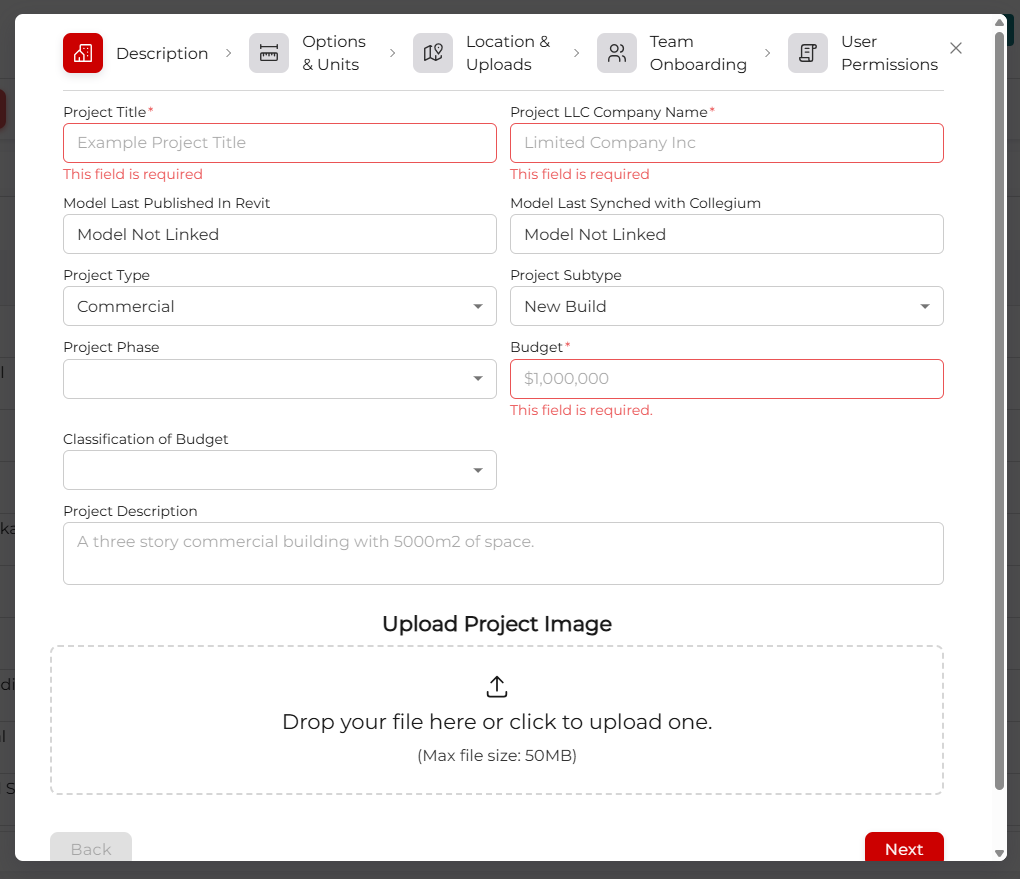
On the Details page, there are lots of basic details to fill in. Required fields are highlighted in red.
- Project Title: What the project should be called.
- Project LLC Company Name: Very likely, each project will be set up as its own company to prevent risk spreading between business endeavours. This is where we document that.
- Model Last Published: Don't worry, this gets populated when you link a project to a BIM.
- Model Last Synched with Collegium: As above
- Project Type: select whether it is commercial, residential etc.
- Project Subtype: New build, renovation, or addition to existing building.
- Project Phase: Where are we in the development process? Are we still figuring it out, or are we actively building?
- Budget: How much is it expected to cost.
- Classification of Budget: How certain are we of the budget? Class 1-5.
- Project Description: A short blurb about the project and what makes it attractive.
- Upload Project Image: You can either drag the image directly on, or click here and navigate to the image. Then click confirm upload to finalise.
Fill it out to the best of your knowledge, and click next.
Step 2: Options & Units
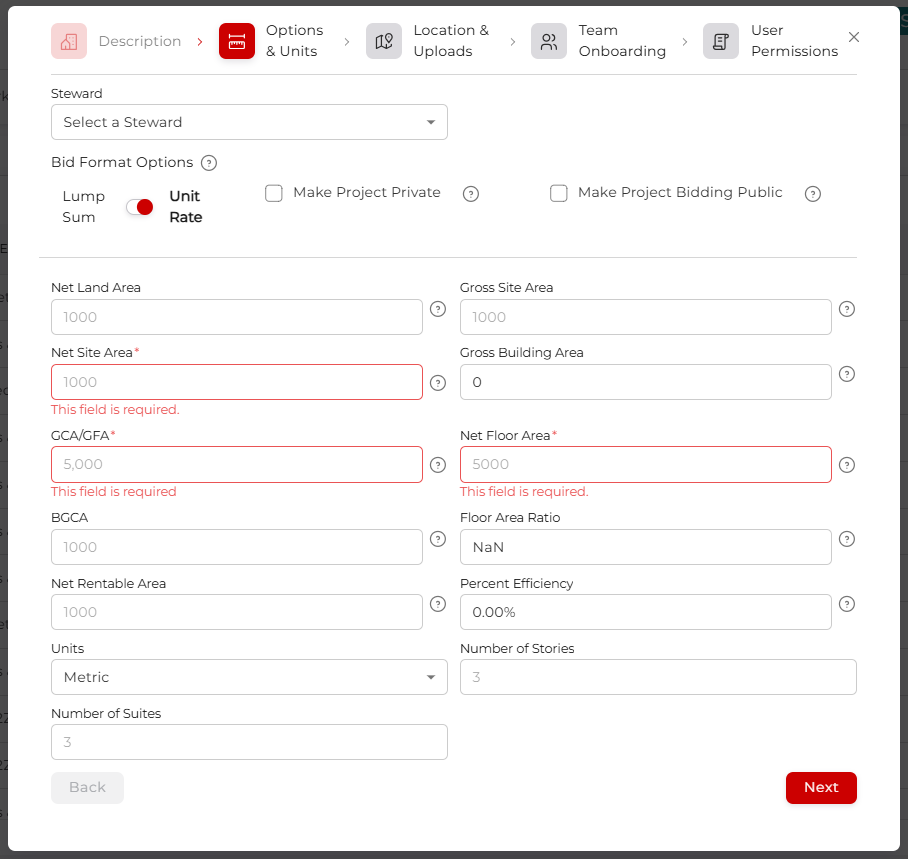
The second page of the Project Wizzard. Here you can:
- Select a Steward: Pick from a list of active stewards.
- Bid Format Options: Lump sum or Unit Rate. Default is Unit Rate, and it's strongly encouraged that we keep it that way.
- Make Project Private: Private or not?
- Make Project Bidding Public: The whole point of a project is to tender the work required to build it. This sets the default for the Work Package Wizzard. Do you want it to be closed, invite-only bidding, or open to anyone.
- Net Land Area: How much physical land does the project occupy?
- Gross Site Area: How much land are you actually going to use?
- Net Site Area: How much land will actually be occupied?
- Gross Building Area: Calculated field. The gross construction area + the below ground construction area.
- GCA/GFA: Gross Construction Area/Gross Floor Area. Two phrases for the same thing. What is the total amount of floor in the building?
- Net Floor Area: Net floor area, Gross Floor Area - walls etc.
- BGCA: Below Ground Construction Area. Total floor area below ground. Basements, parking, etc.
- Floor Area Ratio: Calculated Field. Gross Floor Area / Gross Site Area.
- Net Rentable Area: How much area is actually available to rent?
- Percent Efficiency: Calculated Field. Net Rentable Area/Gross Floor Area * 100.
- Units: Metric or imperial.
- Number of Stories: How tall is the building?
- Number of Suites: How many rental units or individual condos in the project.
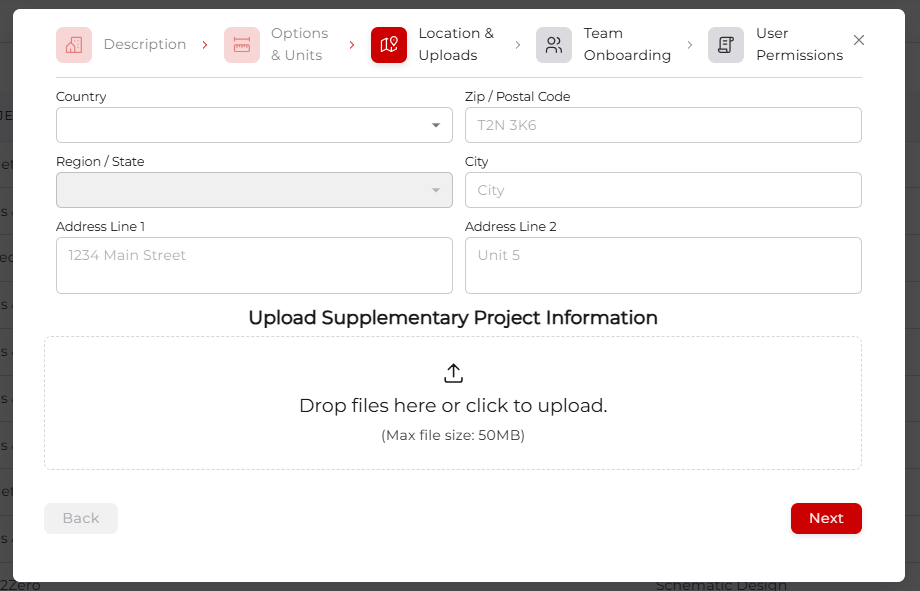
Step 3: Location & Uploads
Basic Address details. The platform uses the address to generate latitude and longitude, so enter a real, complete address.
Project will have overview documentation that vendors will want to see before bidding. This is one place to upload it. Either drag the document onto the upload icon, or click in the box and navigate to the file/s you want to upload via the file explorer.
Step 4: Team Onboarding
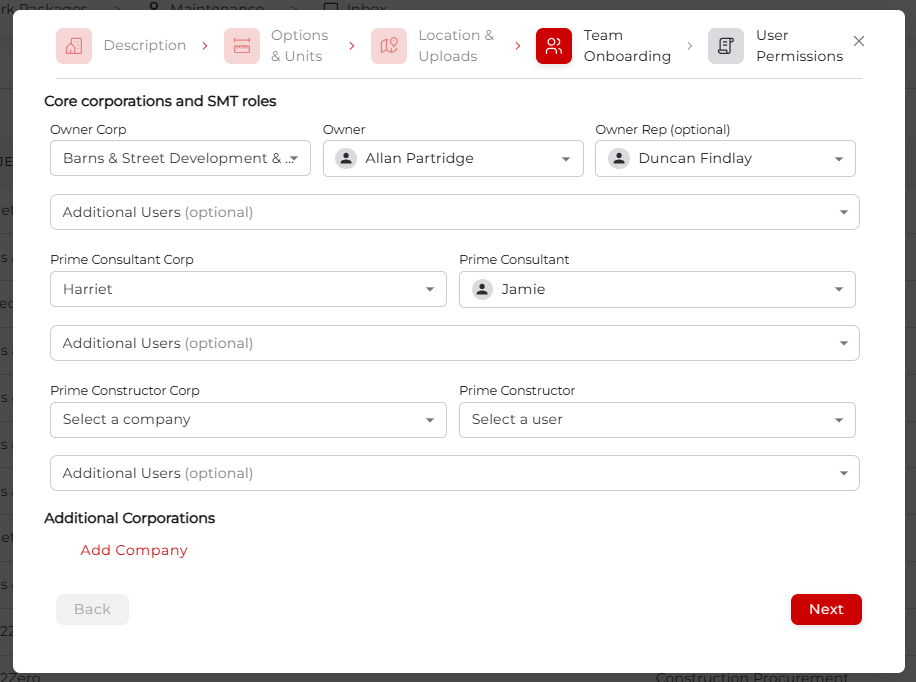
Here we add people who will have roles managing the project. Each "type" of person will have different access to different features on the platform. Start at the top and work down, adding relevant people.
The process is the same for each type (Owner Corp, Prime Consultant, etc.) Select a company from the company dropdown, then select the user from the next dropdown. The user list is limited to those who belong the selected company. The owner corp is also allowed to select a representative. You can then add anyone else that needs access from each company.
To add additional corporations, click Add Company then select a different company and representative.
Step 5: User Permissions
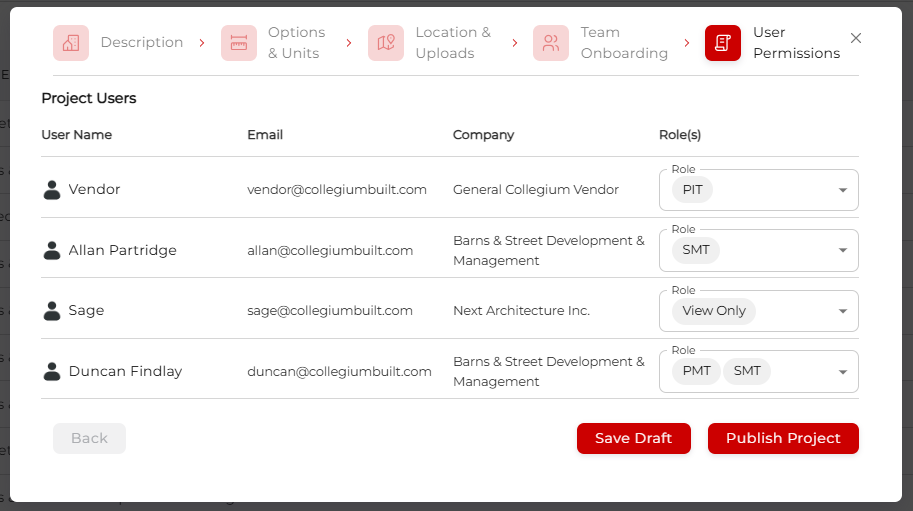
The final step is to assign roles to the users selected in the previous step. There are several roles available, Senior Management Team (SMT), Project Management Team (PMT), Project Implementation team (PIT), and View Only. You can select more than one role per user. Small teams may need many roles per user. So give everyone an appropriate role, and when you're done, click Publish Project. The project will appear in the project list, and the owners will be able to interact with the new project when they log in.