Autodesk Integration
In order for Collegium to do it's magic, and treat the Building Information Model (BIM) as a database for procurement, we need to allow the Collegium app access to your architectural projects in the Autodesk ecosystem. Let's follow along.
Get access to Autodesk Forma
Either we can get the Autodesk Forma hub administrator to grant you access, or you can get on a call with the administrator and provide them with the Client ID and instructions to permit access to Collegium App. Once you are in, there is not a lot to do, but without access, nothing can happen. This also allows-hub specific access, so it is possible that you will have to do this several times for the same client, if they store their models in separate hubs for separate projects.
Log into Autodesk Forma, and navigate to Custom Integrations
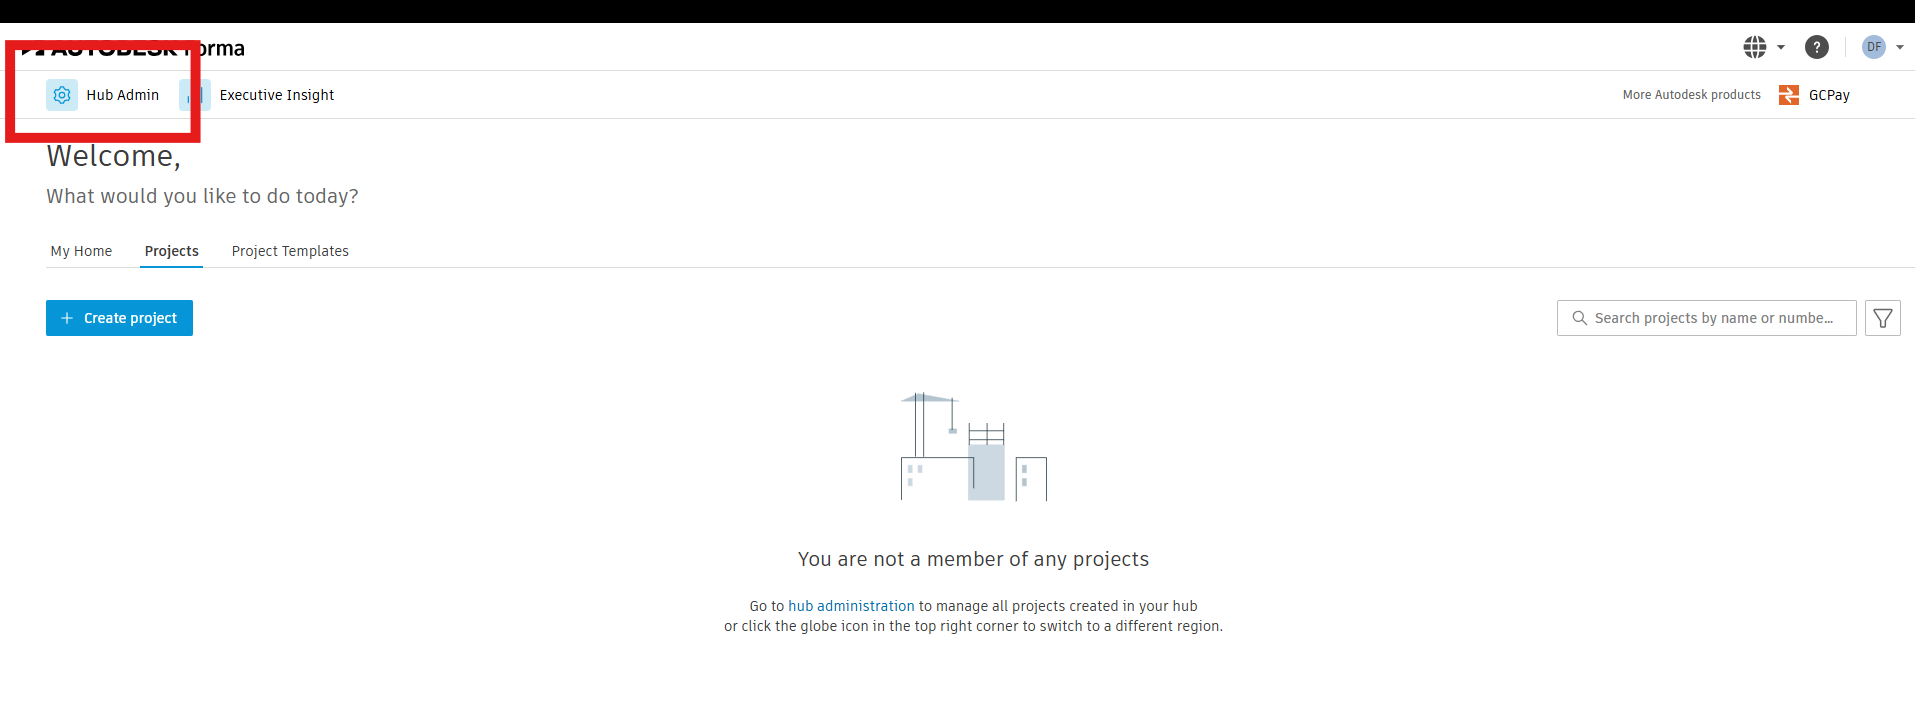
Log into Autodesk Forma, then click on Hub Admin.
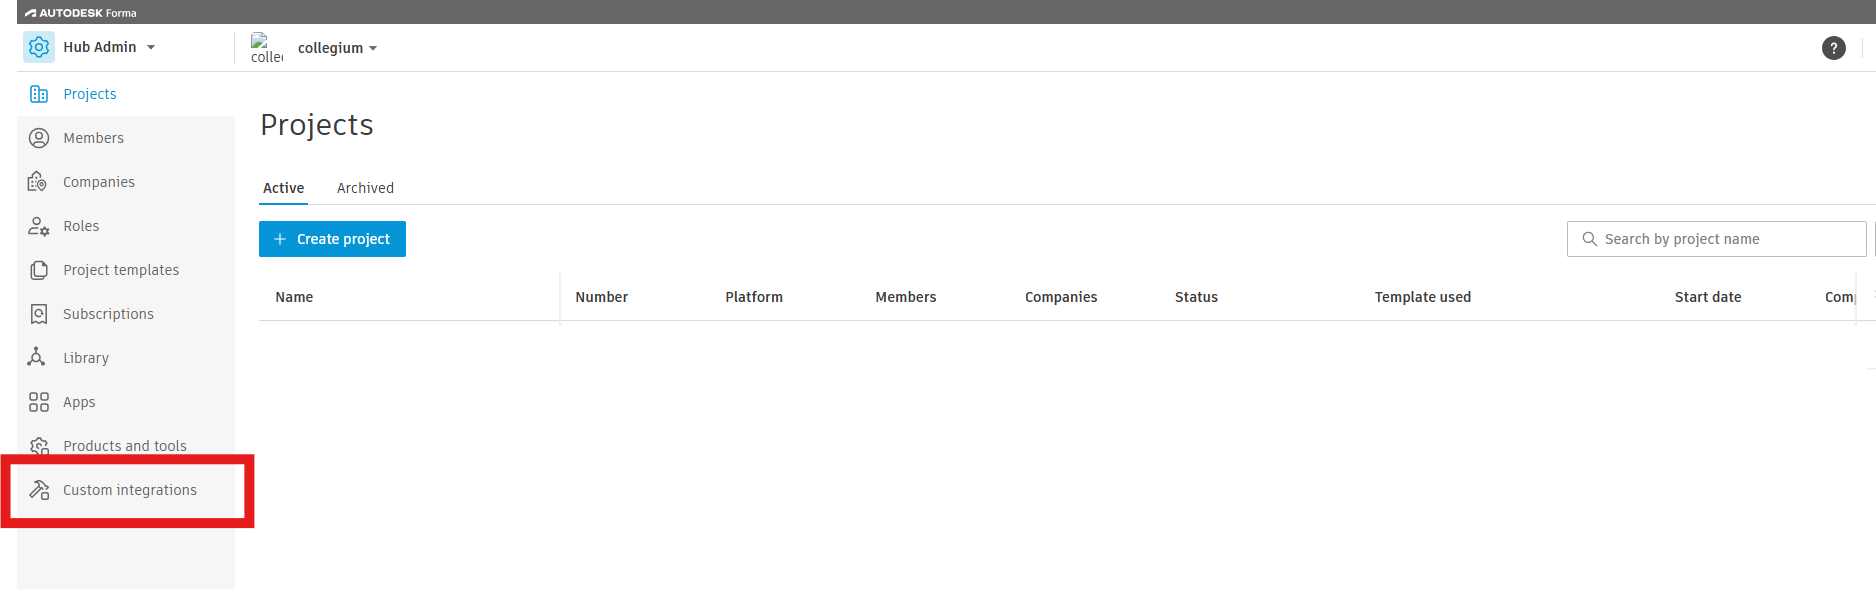
Then click on Custom Integrations.
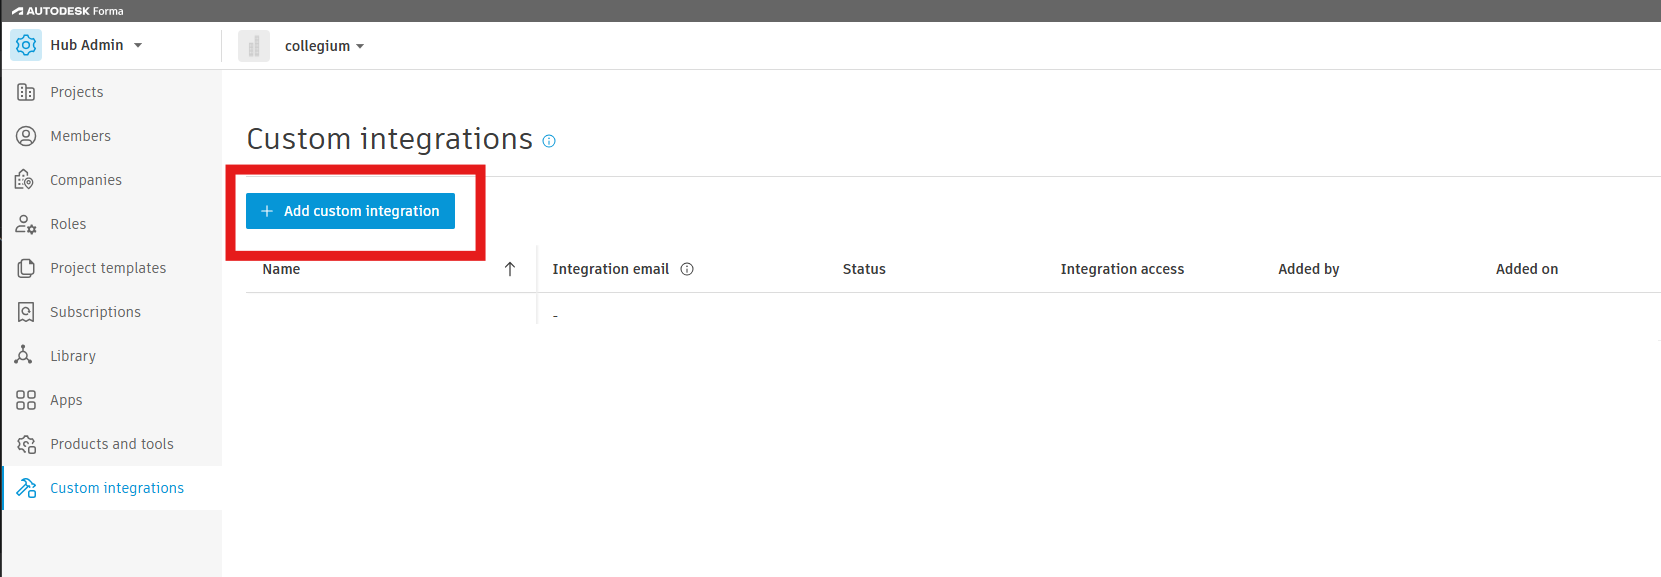
From here click Add custom integration.
Populate the new Custom Integration window
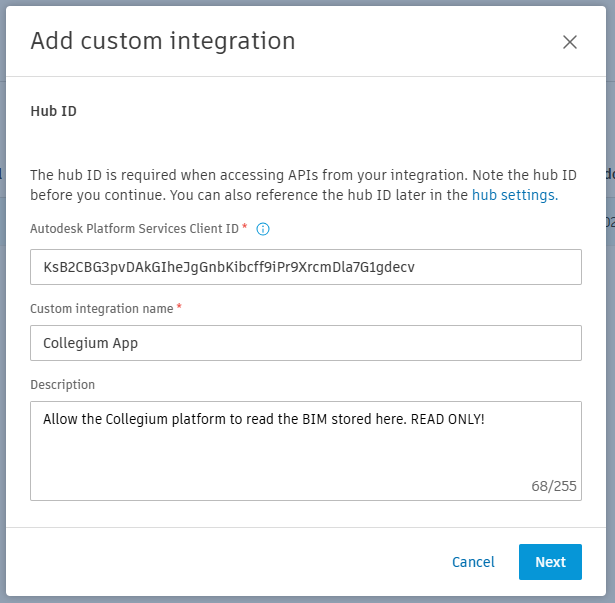
Fill out the first page. Collegium discovers the Hub Id automatically when connecting a model, so it's not crucial that you note it down, and you can read it here at any time.
Collegium's Client ID is always:
KsB2CBG3pvDAkGIheJgGnbKibcff9iPr9XrcmDla7G1gdecv
For background, Collegium is registered with Autodesk, and a request with this Client ID expects an accompanying secret. This ID alone is not sufficient to expose any data from anyone. Think of it like the app's username.
Give the Custom Integration a name like Collegium App and add a description.
When you're done, hit next.
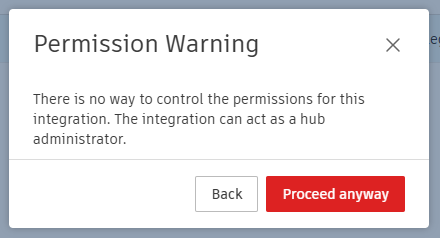
Autodesk may display a permission warning because custom integrations receive hub-wide access. Collegium currently uses this access only to read Revit models and does not modify Autodesk data. Only proceed if you are authorized to connect Collegium to this hub.
That should be it. The Autodesk Custom integration should now accept requests from the Collegium App. You should see the new integration populated on the Custom Integrations page.