Creating a Work Package and Putting It Out to Tender
A work package is one or more model elements and associated tender settings for vendors to bid on.
As an owner with a properly linked and validated BIM, you can create work packages from the model element data in the project Model View.
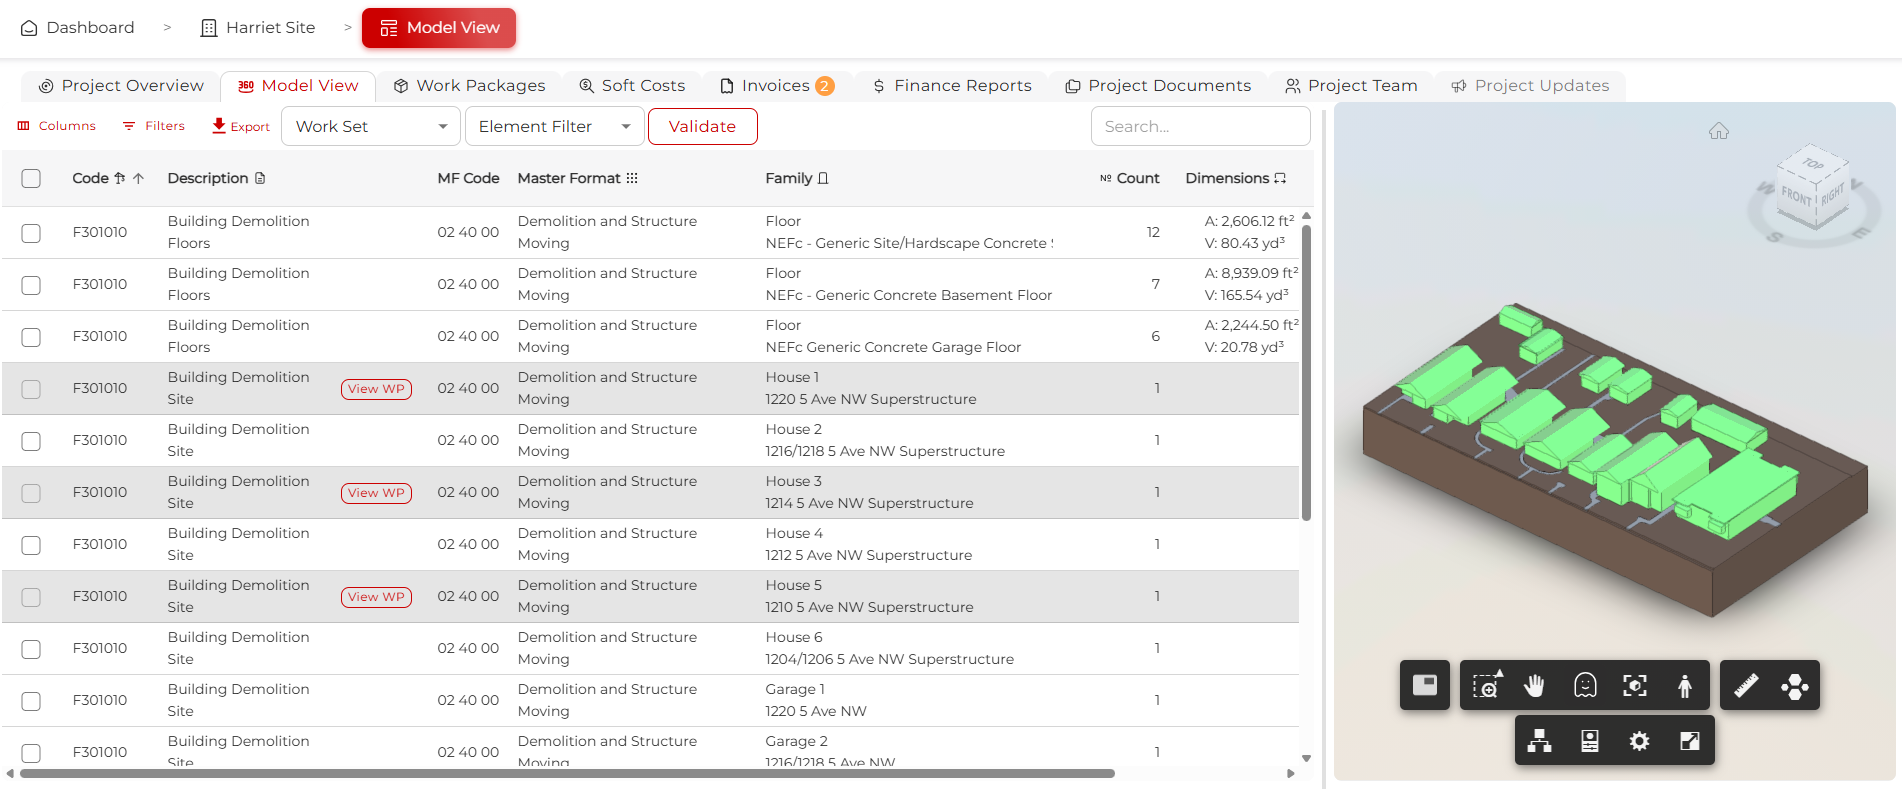
Step 1: Select the Data You Want to Tender
While you have flexibility to construct a work package however you choose, it is recommended that you use MasterFormat codes to align the work package with the appropriate trade. You can type your target model element MasterFormat code or description into the search bar, select the elements, then click Create Work Package in the pop-up.

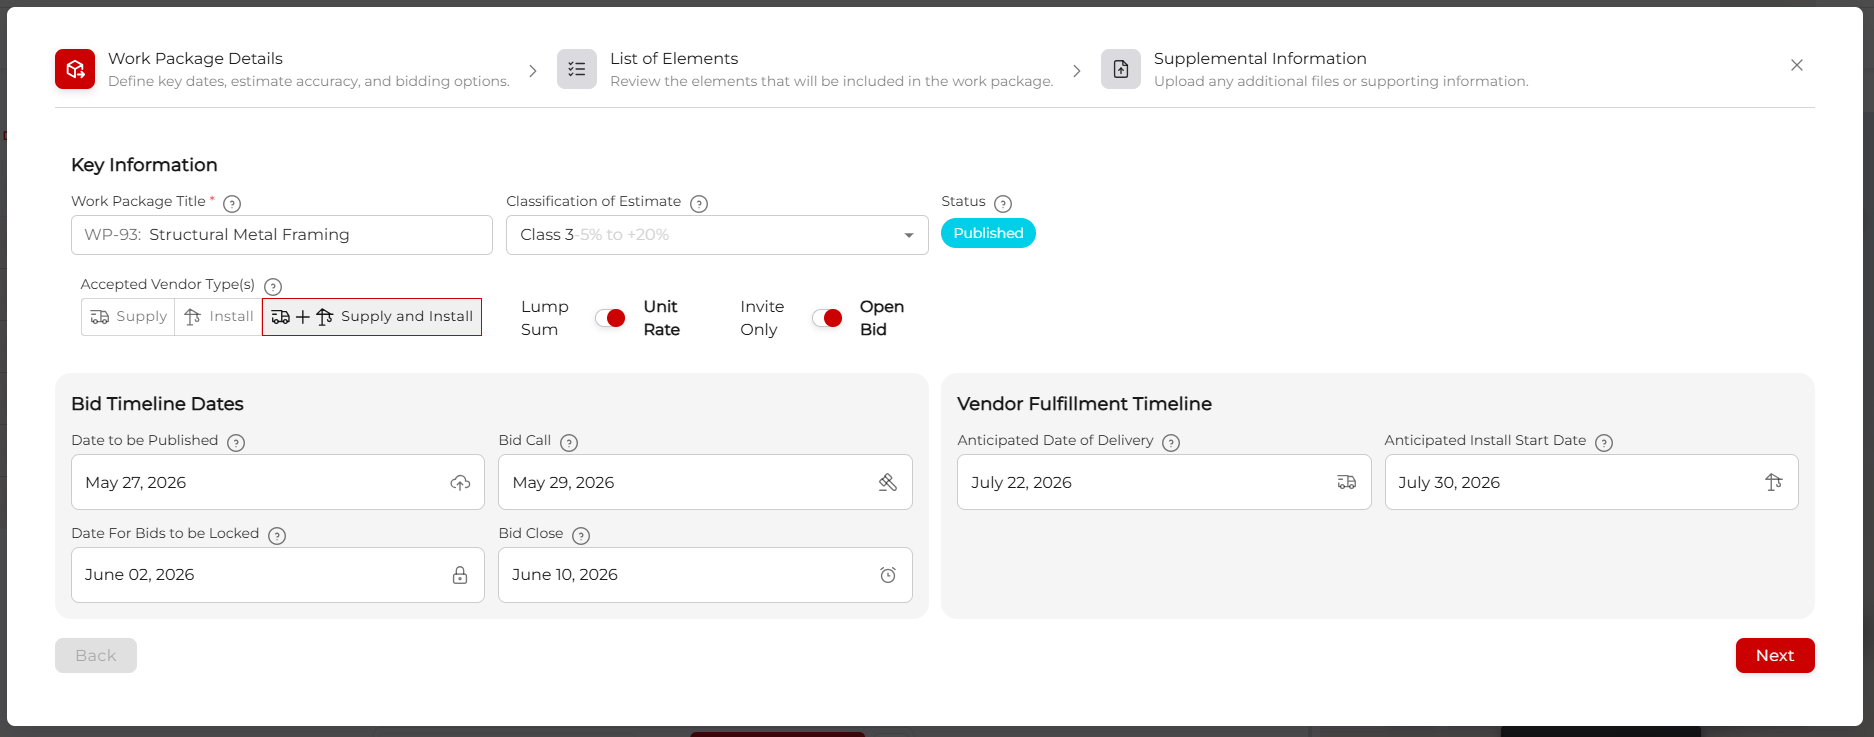
Step 2: Fill Out the First Page of the Work Package Wizard
The Work Package Wizard lets you build the work package to tender. It needs:
- A meaningful name, in this case Structural Metal Framing
- The class of estimate required for the phase of the project
- Vendor type: Supply, Install, or both
- Whether the work package should be Lump Sum or Unit Rate. Unit Rate is strongly preferred.
- Whether it is a closed or open bid: can anyone bid, or only invited vendors?
- A filled-out bid timeline:
- Date Published: after this date, vendors can see the work package
- Bid Call: after this date, vendors can bid on the work package
- Bid Locked: after this date, owners can no longer edit the work package
- Bid Closed: after this date, a bid can be awarded for the work package
- Vendor fulfilment timeline: roughly when you want the materials to be delivered, or the installation to begin, depending on Supply, Install, or Supply + Install
When you are happy, click Next.
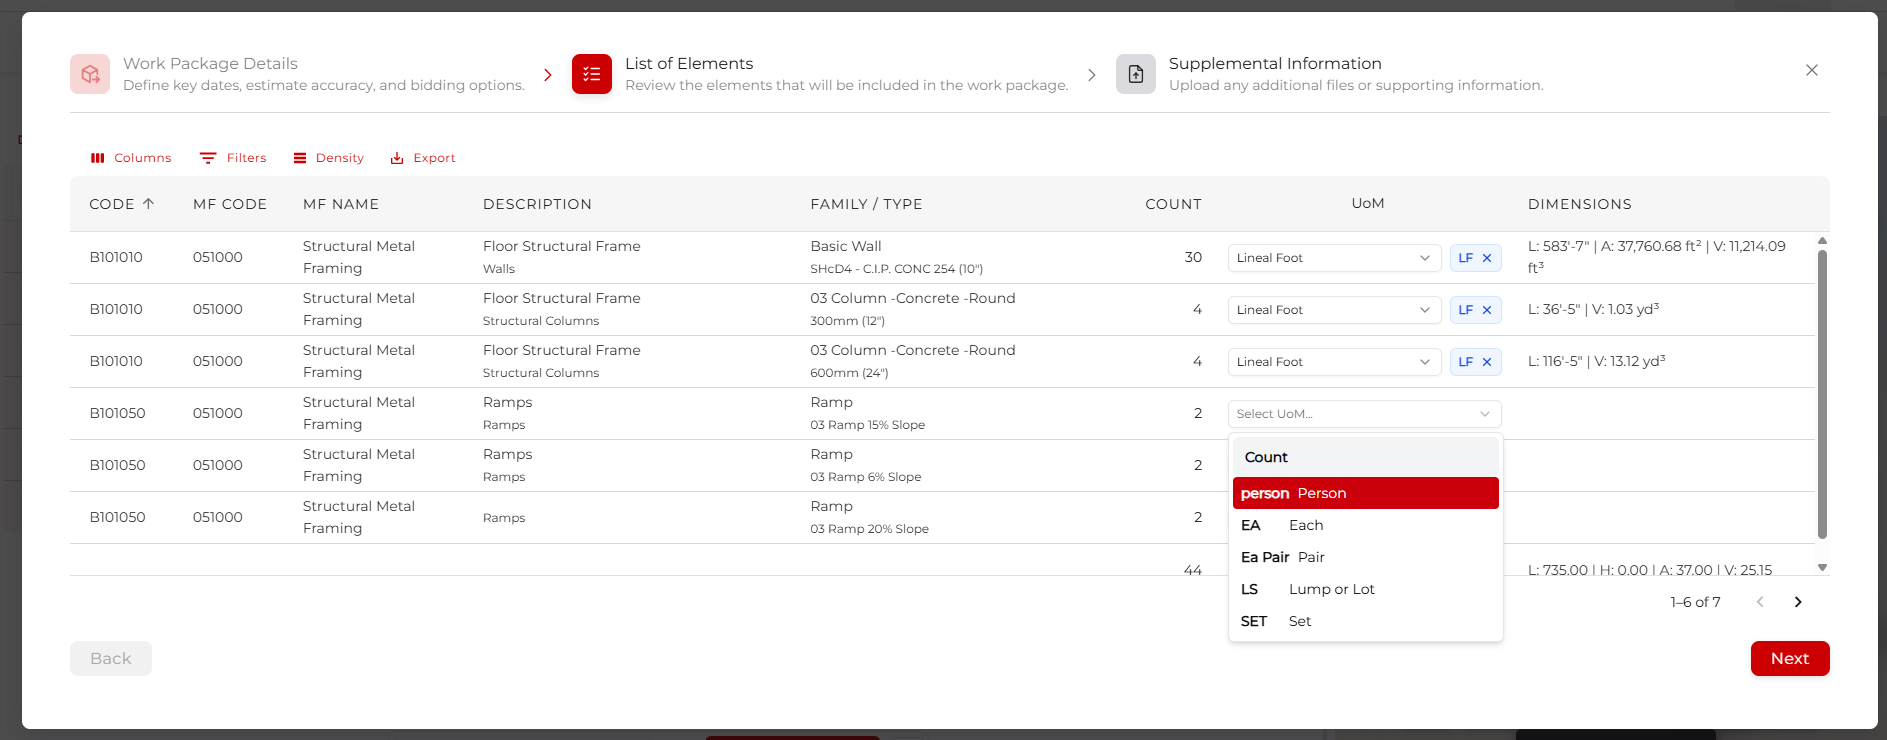
Step 3: Select the Units of Measure per Element Group
Page 2 lets you review the selected data and select the unit of measure you want the work package to be priced in.
Available units depend on the data present in the BIM. You cannot select a unit that is not in the BIM.
You can also export this table as a comma-separated values (CSV) file, which can be viewed as a spreadsheet in whatever spreadsheet software you prefer. Clicking columns also allows you to show all the data associated with these elements.
Once this is filled out to your satisfaction, click Next.
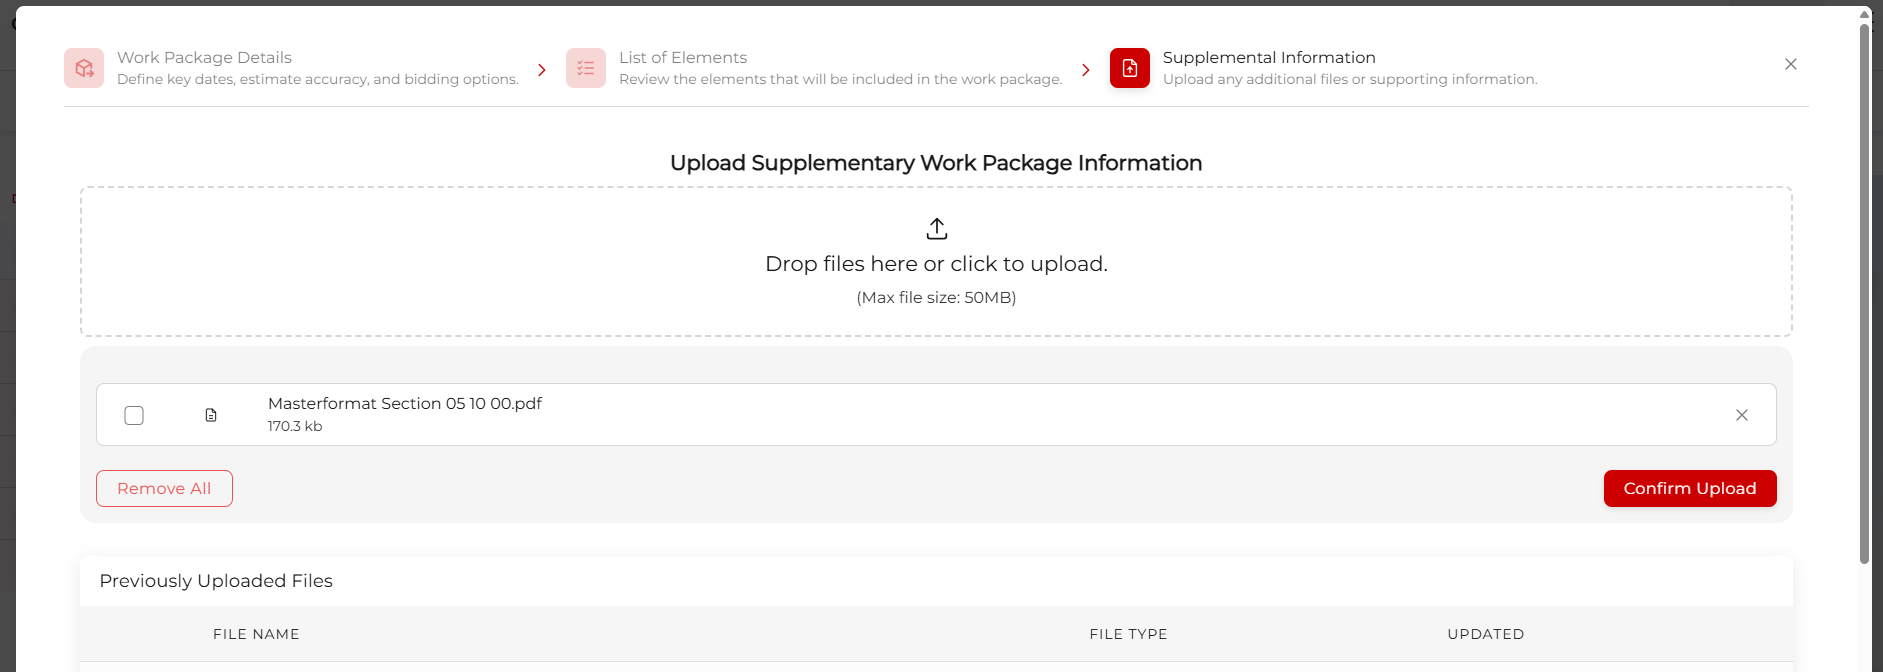
Step 4: Add Supplementary Information Files and Links
Page 3 is for attaching any files or links that are relevant to the work package. Think specification sheets. Only upload files relevant to this work package. Vendors will be able to see documents associated with the project.
You can either drag the file you want to upload onto the designated area, or you can click in the same box, navigate to the file you want to upload, and click Open.
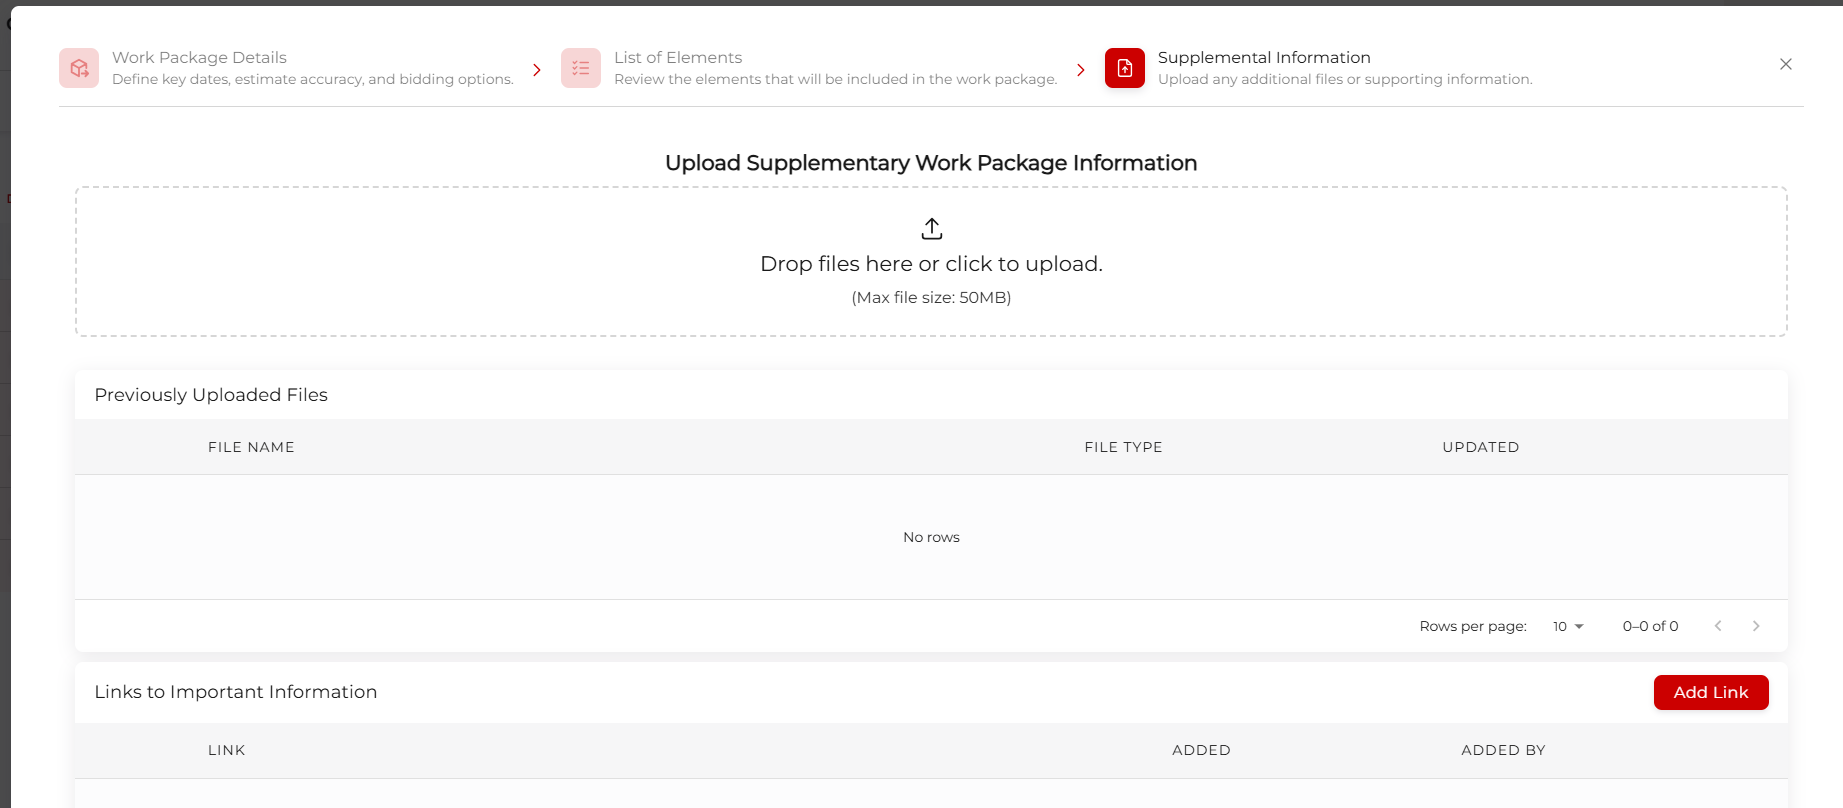
Then click Confirm Upload.
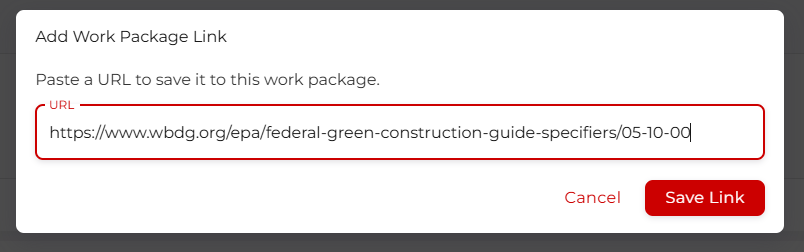
If you want to add a link to a specification document, click Add Link, paste the link in, and click Save Link.
When you are happy with the files, links, and specs, click Submit. When the platform has completed saving all the data, you will be routed to the work packages table.

Step 5: Edit a Work Package
As long as the work package is not locked or closed, based on the bid timelines established above, you are free to edit any of the settings you have entered. Simply navigate to the Open Work Packages tab, and click View on the work package you want to edit.
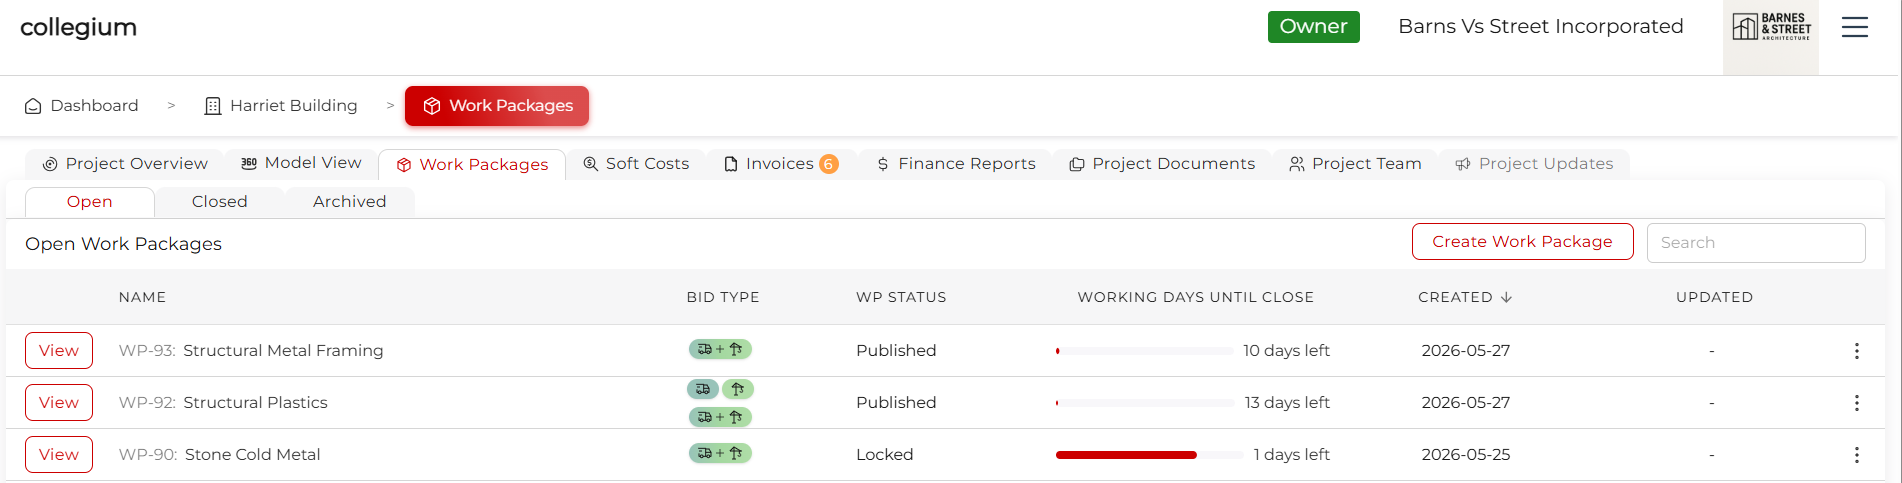
You can now click Edit Existing Work Package to reopen the work package wizard, where you can edit whatever you need to.