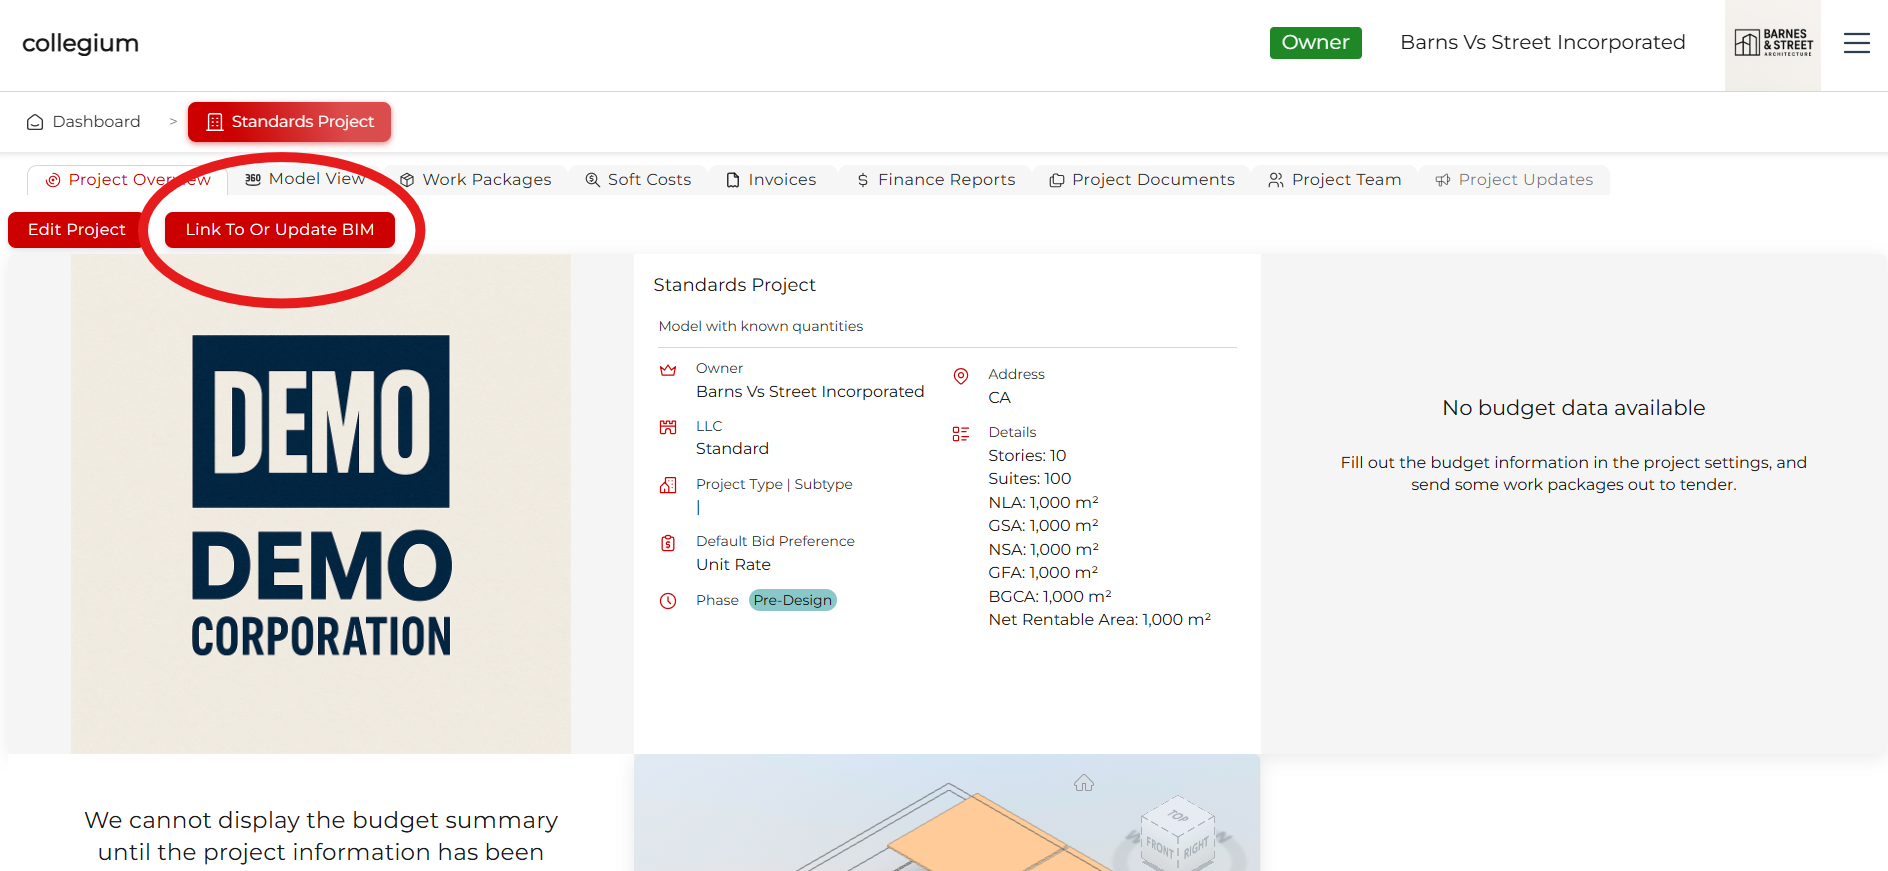
Linking a Building Information Model (BIM) to your project
The BIM is vital to your Collegium experience. The Collegium platform treats the BIM as a database, and ties all the procurement workflows and reporting to actual modelled objects, so we preserve data fidelity all through the process. To link a model, simply navigate to the project overview, and click Link to or Update BIM.
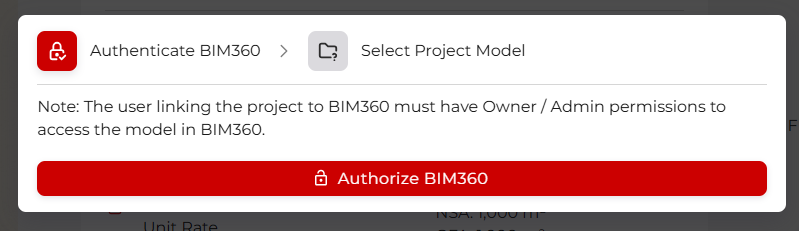
Step 1: Authorise BIM360
For security reasons, you must be authorised to link the model stored in BIM360 to Collegium. After you click Link To Or Update BIM, click Authorise BIM360 and follow through the Autodesk login procedures.
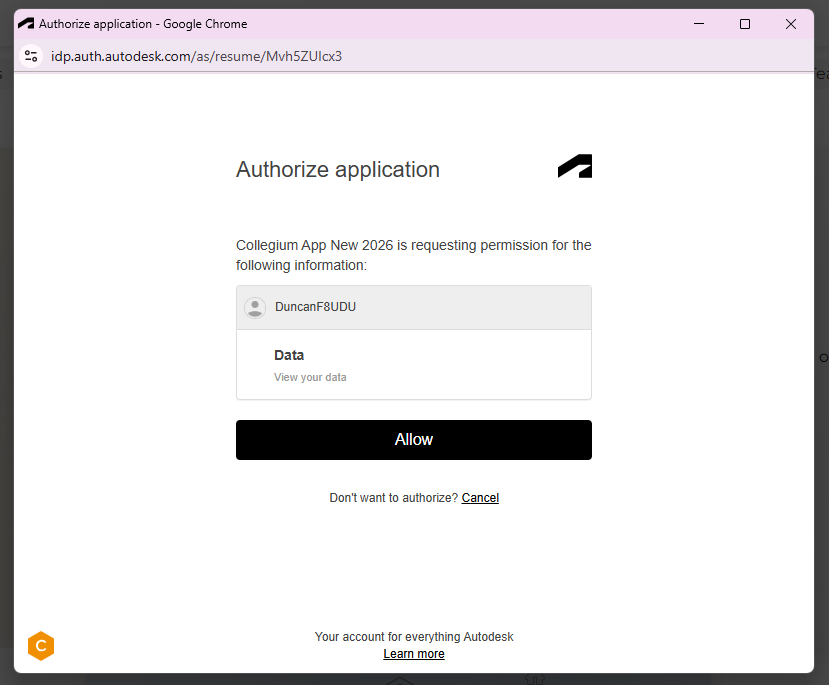
Once you are logged in with Autodesk, click Allow to grant permission to Collegium.
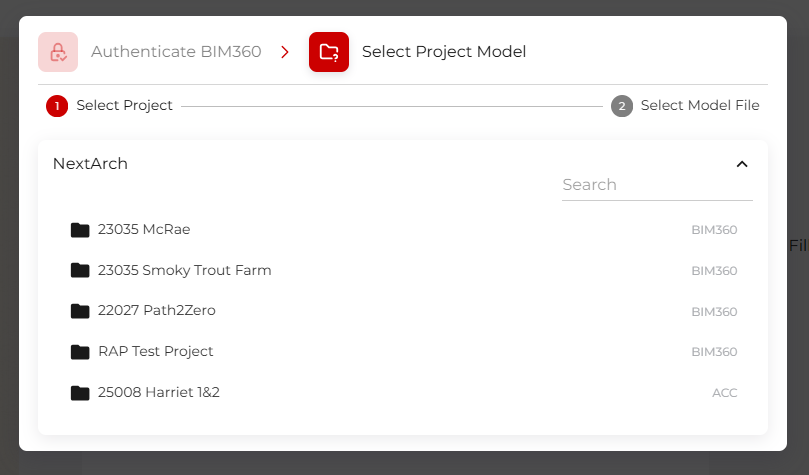
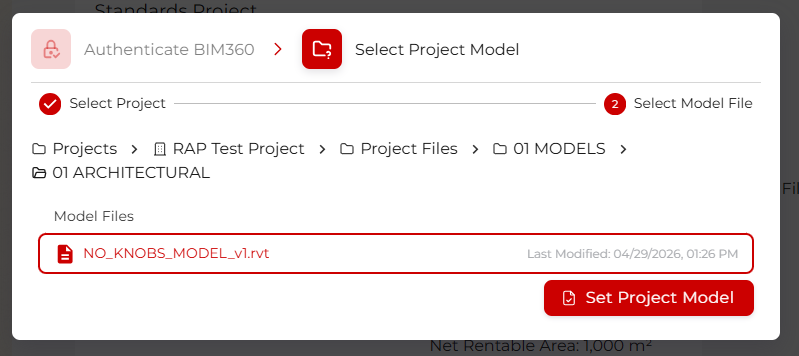
Step 2: Navigate to the Model File
When successful, the Collegium window will say Connected Successfully then will show a navigation tool. Expand the root folder (in this example, NextArch) and select the folder you want to open. You can also type into the search if you know exactly what you need.
Step 3: Select the Model File and Set It
Your file structure will vary, but navigate through the file structure, locate your model, select it, then click Set Project Model.
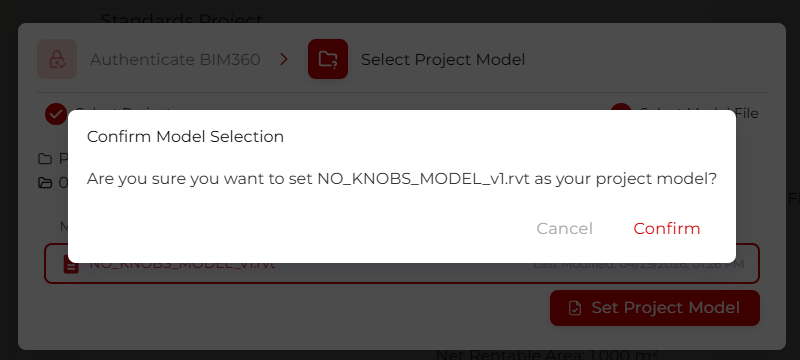
Click Confirm in the resulting pop-up. Then wait a few seconds while the system updates.
Step 4: Confirm the Model is linked
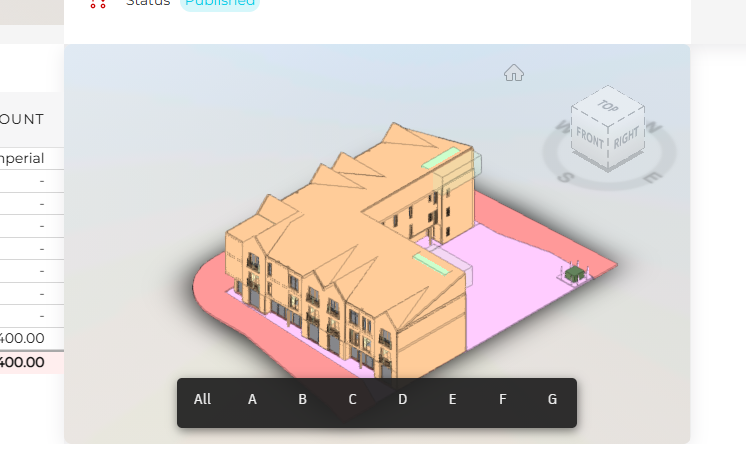
The model should now be linked to the project. On the project overview tab, you should now see the model, selectable by Uniformat division.
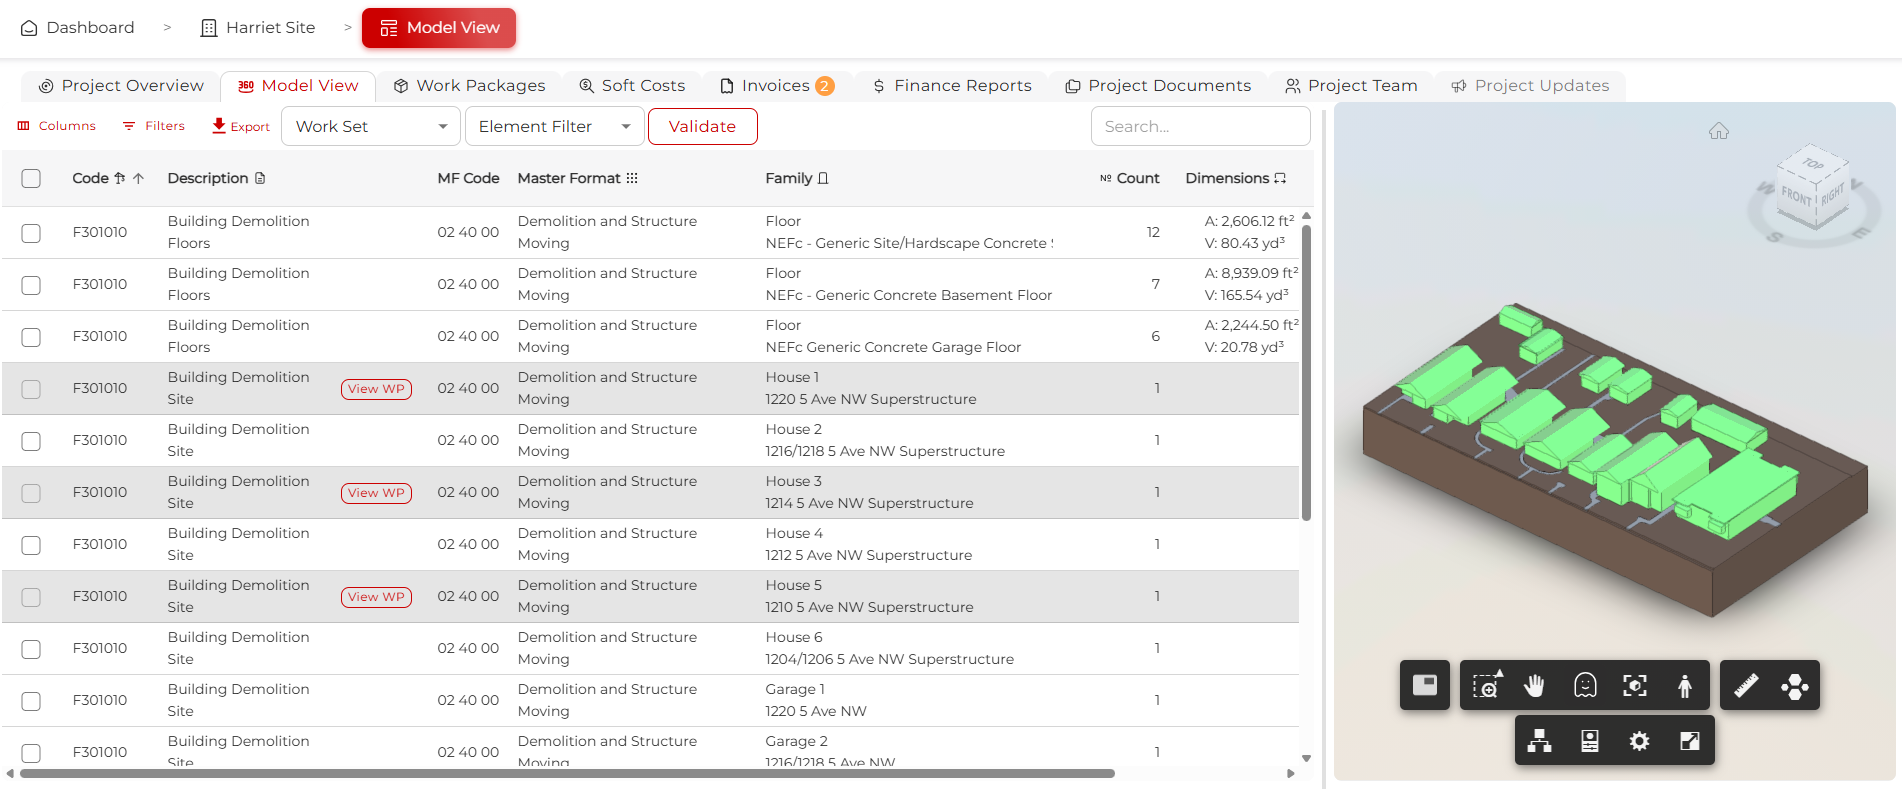
In the project Model View tab, the data table should be populated with the model elements and their data.
Troubleshooting
If you run into trouble executing these steps, contact your steward. Your BIM360 project may need to be set up to accept a Collegium connection